How to use enThriven CRM
Quick guide for adding users, sorting leads, and assigning ownership.
Create multiple organisations
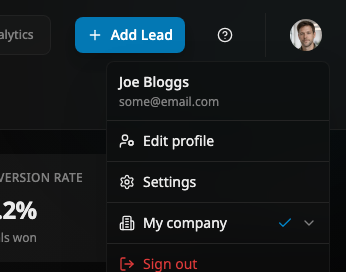
- Open the profile menu in the top-right of the dashboard.
- Select `Create organisation`.
- Repeat as needed to create separate organisations for different teams or clients.
- Switch organisations anytime from the same profile menu.
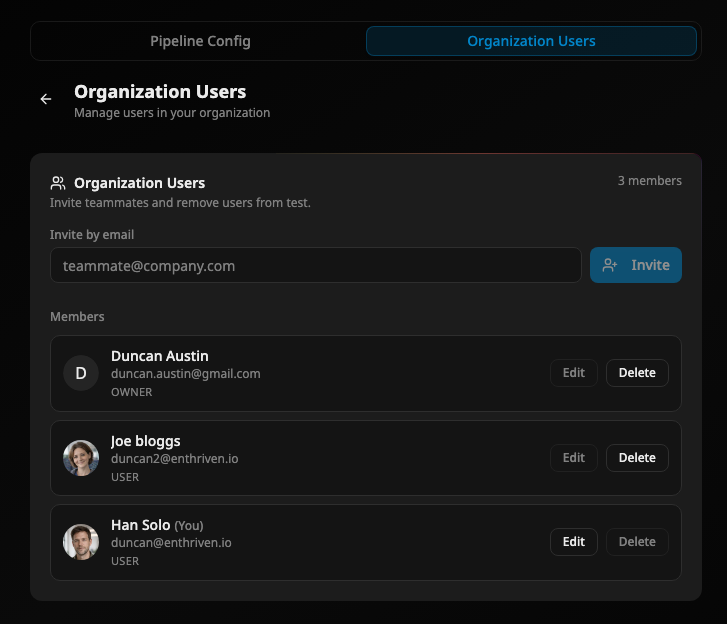
Add and invite users
- Open `Settings` from the profile menu in the top-right.
- Go to the `Users` tab.
- Use invite/add user to send an organisation invite.
- Set each user role as needed (Owner/Admin/User).
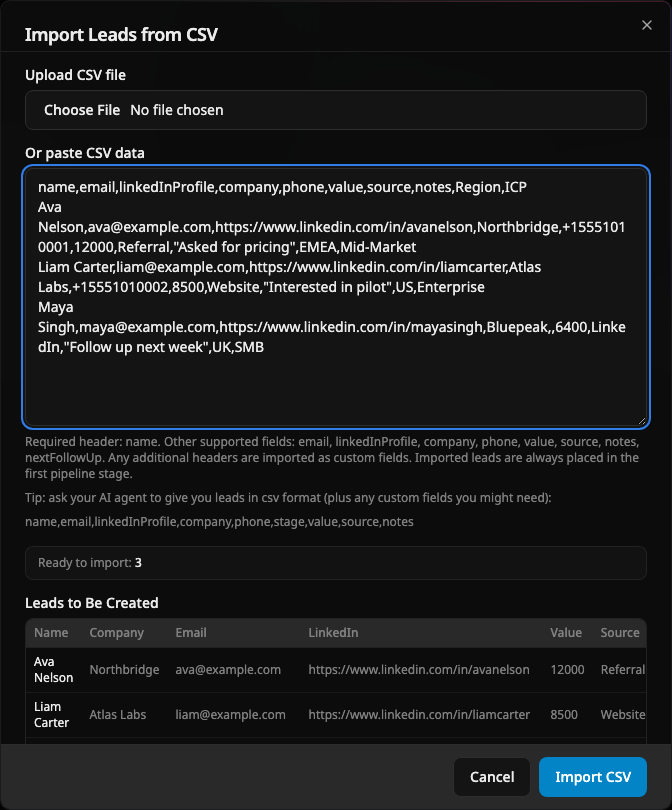
Bulk import leads from CSV
- Click the `Add Lead` split button in the header.
- Open the dropdown and choose `Upload CSV`.
- Upload a `.csv` file or paste CSV data into the dialog.
- Review the `Leads to Be Created` preview table before importing.
- Click `Import CSV` to create all leads in the first pipeline stage.
Extra CSV headers are imported as custom fields and appear in lead details and the edit lead dialog.
Tip: ask your AI agent to give you leads in csv format (plus any custom fields you might need):
name,email,linkedInProfile,company,phone,stage,value,source,notes
Sort your pipeline
- `Manual`: drag leads into your preferred order.
- `Amount`: sort by highest value first.
- `Next follow-up date`: prioritize leads that need attention next.

Connect Google Calendar
- Open `Settings` from the profile menu.
- Go to the `Calendar Sync` tab.
- Click `Connect Google Calendar`.
- Sign in to Google and approve calendar event permissions.
- Back in CRM, click `Sync now` to push all existing assigned follow-up dates.
After setup, creating a lead with a follow-up date or updating a follow-up date will update the related Google Calendar event.
Tip
You can disconnect anytime from `Settings` > `Calendar Sync`.
Toggle automatic stage percentages
- Open `Settings` from the profile menu.
- Go to the `Pipeline` tab.
- In `Probability weighting mode`, choose `Automatic` or `Manual`.
- Automatic becomes available after more than 5 terminal leads (`won`/`lost`) exist.
- Switch back to `Manual` anytime if you want direct slider control.
What changes
In automatic mode, slider controls are hidden and each stage percentage is calculated from historical won/lost outcomes.
Read Win/Loss stage coverage
- Open the `Analytics` page.
- Find the `Win Stage Coverage` panel.
- Each row shows the percent won out of leads that reached that stage and ended in won or lost.
- Blue indicates won share and red indicates lost share for that stage.
How to use it
Use high-performing stages to prioritize similar leads, and improve stages with lower won percentages.
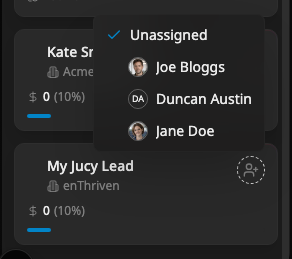
Assign Leads to Specific People
Assign users to leads by clicking the Profile icon on the lead card.
"Assign To Me" shortcut:
Press Cmd + I on macOS, or Ctrl + I on Windows while hovering a lead to quickly assign it to yourself.